Monday, 18 March 2013

Studio Photography: Low-Key

Low-Key

Low-key lighting is when only one main light source and usually a black background is used to light the subject.  It works very well on male subjects and helps to give them a dark, masculine and sombre look. Although, I have seen low-key lighting work just as well on female subjects.  Low-key lighting is fairly opposite to high-key lighting.  There are more shadows and darker tones, helping to create a contrast in the image.  Low-key lighting can create drama and highlight the skin tone and contours of the face, which adds to the personality of the subject.           


This is a classic Hollywood image of Johnny Depp, and one I thought that demonstrated low-key quite well.  You can tell one light source was used to light one side of his face but it also appears that another low light may have been used to create a contrast between his hairline and the background.  It's not a very serious look but still works really well to highlight his strong masculine features.      


To create our low-key image the studio was set up with a black background and one poly board to block off light from one side and another two placed at an angle to allow in only a narrow band of light.  The lighting was very much controlled because of the poly boards and reduced any spillage.    


The first image is of one of my female classmates.  This image demonstrates how this type of lighting can work with a female subject and convey a similar sort of message to the male one.  The lack of smile on the subjects face shows the serious side her to her character.  It's quite an atmospheric image and works really well because of the outline of the hat follows through to the outline of her face.  The reason I didn't choose this image is because of the lack of eye contact and so it doesn't hold my attention long enough before I want to move on.         


I chose this image for my final submission because  for me it represents low-key extremely well.  It also helps to have a subject who's good at making faces and so happened to make the right face in this situation.  I really like the way the light has caught his eyes and falls down nicely from his face to his hands and down his arms.  There's a lovely line which helps to guide your eyes through the image.  The strong eye contact holds the viewers attention and the look in his eyes makes you question what they're trying to tell you.  Utilising selective lighting and using dark shadows as primary elements, this low-key light set up has helped me to create an image that looks very mysterious and atmospheric.      


Finally I decided to include this image I took prior to doing my single portrait shoot. This was done as a test shoot so I could experiment with the lighting before I had my model in the studio.  For this I used a single light which has helped me to create a low-key image.  It has all the qualities of a low-key image - a sense of drama, atmosphere and a sombre feel to it.  I'm very pleased with this image as I felt a lot more confident playing around with the lights to get what I really wanted.  It shows how practise can really make you perfect - although not quite perfect in my case!     


Studio Photography: Portrait & Still Life

Portrait

One of the tasks I was least looking forward to doing was the one piece of studio portrait we had to produce by independently assembling the set and lighting.  Not because I was worried about setting up the studio or lighting but mainly because working with models was my least favourite activity. And my experience whilst trying to organise this has only reinforced my views about working with models.   

I initially asked Sara from my class, whether she knew anyone who may be interested in doing some modelling for me.  She gave me details of someone she knew who I contacted and arranged to come in the studio on a specific date.  When I got into college the following week, I noticed my name had been crossed out from the studio diary and instead replaced with something along the lines of 'FdA priority' I presume it meant the degree students were using the studio. So I quickly cancelled my model and told her I would contact her soon to give her a different date.  Later that day, Andrea my very generous classmate offered to let me use the studio for one of the mornings she had it booked, as she was busy doing something else that morning. I contacted the model but she wasn't available that day!! I desperately tried to get another model and luckily for me, Rukudzo, kindly helped me to recruit one via the wonders of Facebook.  It was all set and ready to go until the night before the shoot when I decided to text my model to check everything was ok, when I'm told that her dad can no longer give her a lift! Not wanting to lose my model, I offer to pick her up in the morning. Little did I know what was to come next!!.  On the morning of the shoot I get a text from her saying there's a problem with their boiler and she has to stay home and wait for work men! it's not really her fault and there wasn't a lot she could do about it, but it didn't help my situation! 

I didn't want to waste my morning and the studio was already booked so I decided to pick my nephew and made my way in to college.  I took quite a few photographs of my nephew, but like most children, his attention span wasn't great and I found it difficult to keep him still without him getting bored.  When he did stay still he would freeze up a little and his expression did not look very natural. Perhaps if I had taken something in like a toy or something to entertain him then maybe I would have got him in a more relaxed state.  However, it was all last minute and I didn't have much time to plan this shoot.  


Initially the lighting set up included the black ground with the two black poly boards on either side.  I didn't want any additional light spilling onto the subject from the sides or to create any unwanted shadows.  I used a beauty dish, which is great for portraiture and to light up my nephews features and a softbox to soften the light a little.     


The resulting image was ok, and this is the best one of the bunch as he's got a lovely expression on his face, good eye contact with the camera and a fairly relaxed pose. I think the image looks much better in black and white than colour but the problem here is that because he's got black hair it seems to have merged with the background.  There's also a some shadows under his chin and I should have used the reflector to eliminate this. 


I decided to change the light set up around to get a bit more light from behind his head so you could see the hairline. For this I used a snoot, which gives a sharp directional light.  I also used a rectangular softbox to give a narrow band of light as I wanted to do a full length portrait.    


This is the best image from that set up. I decided the full length portrait didn't look as good so I cropped this image to bring the attention to his face.  I'm still not very happy with the image because a strong light has fallen to one side of his face and looks a little over exposed and there's still some shadow on the top of his nose.  I could have used a smaller aperture to let in less light but then I may have under exposed the rest of the image.   I also think he has a glazed look on his face, which doesn't reflect his personality very well or do justice to how he really is - lively, chatty, inquisitive and cheeky! he was quite bored by then and just wanted to go home! who can blame him? standing in front of the glare of the studio light for half a day!   


Not entirely satisfied with my result I decided to book the studio for the following day and possibly use one of my fellow class mates to model for me.  It was then I came across Roman, who made a bit of an impression on me. Piercing eyes, very strong jawline and well structured cheekbones, I immediately thought he had the perfect face for a strong portraiture.    


I changed the studio lighting around a few times to see what sort of result I could achieve and practised on two willing victims (Andy and Sara!). I finally settled on a slightly low key set up with black background, black poly boards on either side, two soft boxes in front for a slightly high-key affect and a light with honeycomb from behind to illuminate one side of his face/hairline.    


I quite like this image of Roman and it does look better in black in white than did in colour but just like my nephews photograph, it was difficult to separate his hairline from the background.  Otherwise, I do feel it's a fairly strong portrait as the lighting works really well on his face.  I used a new Black & White Adjustment Layer on Photoshop and then used Hard Light on the blending option to bring out his features.   


For my final submission I selected the following image.  I feel it's a really powerful image and one that draws you in to look deeper into his eyes. It's by far the strongest portrait I have produced in the studio to date.  I love the look in his eye, they look quite menacing and slightly intimidating - exactly the look I was aiming for.  The light worked quite nicely as it highlighted one part of his face whilst the other side was slightly darker, adding to the moodiness his character.  The cap on his head and the headphones around his neck gives the impression of a young trendy person, but with a slightly serious side to him. The image works really well because everything he's wearing contrasts very nicely with the dark black background, without blending in to it.  To sharpen his features even further and to give him that slightly edgy look I turned the image to black and white and then used the Hard Light blending option. I feel this has given him a slightly rugged look, which compliments his features very well.                


Still Life

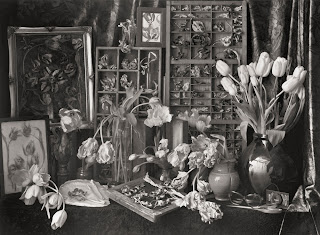
I've always enjoyed photographing flowers.  I think it's the colours, shapes, textures and variety that attracts me to them.  I think someone once said if you can master photographing flowers then you can photograph anything! could have been John Kiely?! Flowers have been traditionally photographed to represent their  soft, delicate and fragile quality.  However, having been shown images from the tulip series by well known British photographer, John Blakemore, I wanted to try my hands at something different.  Blakemore spent many years photographing still life, which included a series of images of tulips, where he would photograph them in natural light and particularly when they were past their best, typically a few weeks after their peak, capturing their gradual decline and natural elegance.


http://www.lenscratch.com/2012/12/john-blakemore-at-klompching-gallery.html

For my still life I decided do some experimenting at home with a bunch of flowers I had.  I'd had them for a while so they were gradually wilting and withering away.  I took the following images at night so I didn't have to worry about any light spillage from outside.  I turned the main room light off and made sure there was no light coming in from any windows or doors.  I then used the assistive light on my mobile to direct it towards the vase of white roses I had placed on the dining table.  I wanted to highlight the decay of the roses and create a dark and moody atmosphere at the same time.  I quite like the two images below but I personally think they are a little too busy which can look a bit distracting.  I think the usage of a single light has worked quite well to create some nice shadows but overall the images are not strong enough to go in my final submission.     


I decided to isolate one of the roses and focus on creating one strong single image.  For this image I used just a table lamp which was pointing towards the rose. It was quite a strong light but I like how it has filtered through the whole rose, almost illuminating it from the inside.  As it was night time photography and the lamp had a tungsten light, it had created a golden warm glow to the white rose.  The textures on the petals show up very nicely, highlighting the beauty in its decay.         


I feel the conversion to black and white and slight sharpening worked better with the rose and helped to bring out its characteristics and provide a nice contrast  with the background.  The viewers attention is now focused on the rose, with very little distraction.  In conclusion I feel it's a fairly ok image but its not strong enough to be included in my final submission - to me it looks too ordinary and somehow lacks imagination!.  However, due to time constraints I will make do with this for now, but I would like another attempt to produce something even better than this for my still life submission. For now, this'll have to do! 


Sunday, 10 March 2013

Studio Photography: High-Key


High-Key 

High-key lighting is something that was used in the early days of cinema.  The aim of it was to reduce contrast, as early films and television could not cope with extreme contrasts of blacks and whites.      High-key photography involves the elimination of all shadows to produce a bright, crisp, well lit images, with very little tonal variation   These days high-key is very popular in fashion and portrait photography as they can evoke a feeling of freshness, optimism and energy.

This is an example of high-key lighting I grabbed from Google images.  The portrait has very little shadows and her features are highlighted very well.  This type of lighting compliments subjects that have a  fairer complexion and lighter coloured hair and possibly wearing pastel shades.    


The lighting set up for high-key is a white background with two 3k heads with deep reflectors pointing towards the background.  To light the subject you need two 1.5k softboxes pointing towards the subject.  Best to start off with the lights and subject at 45 degrees and then the position of the front light boxes can be adjusted as necessary.  To get a good spread of light and to bounce the light on the subject, it's a good idea to add white poly boards on either side.  The background lights should always be two stops brighter from the font lights in order to achieve an evenly lit portrait and to get a pure white background.        


High key lighting set up - white background with two deep reflectors pointing at the background and two large softboxes pointing towards the subject


I chose this image for my final submission for high key photography.  It was shot using a medium format camera and all the lighting was set up by John, our tutor.  The lighting diagram above demonstrates the set up for this shoot.  A reflector was used under the subjects face to bounce the light back and to reduce any shadows from appearing under her chin.  Using softboxes helped to create a softer pattern of light, highlighting her facial features.  

I've seen the rise in popularity of these types of images over the years, and can understand why it may appeal to some people, but I personally am not very keen on this type of photography.  To me it feels too clinical and gives no depth to the character of the individual. It works best in a commercial setting as the sole purpose would be to highlight specific features of a product in order to make it appealing to the consumer but definitely poor for showing mood or atmosphere.              

Wednesday, 6 March 2013

Studio Photography: Lighting texture

When photographing still life objects, it's really important to have the correct lighting set up in order to capture the finer details and the textures and tones of the object.  

For this task I took a few items from home, which I thought would be ideal for texture.  Wasn't sure what to bring so just grabbed whatever was nearby.  I took an orange gerbera (to add a bit of softness) and some chickpeas, as I thought    the fine delicate petals of the flower would work nicely with the rough textures of the chickpeas. Although the colours complimented each other really well, I felt there was something missing.  This is when I decided to use one of my class mates shell alongside the other items.  Later on the day I collected a few leaves and tree barks to add a bit of variety to the images.

Photographing still life can be quite tricky and you may need to add various light sources to light up specific part of the subject.  You also need to have greater control of the lighting in order to create a certain mood or ambience as an inanimate object cannot react to different lighting conditions.   

For this studio session we used the Mamiya RZ67, which is a beautiful medium format camera.   
Leaf Valeo 17(LF5339)/Mamiya RZ 67      


http://www.lightingdiagrams.com/Creator


For the images below a flash light was placed high up from the back of the still life table, which had honeycomb and barn doors, almost directly opposite the camera.  This allowed the light to skim across the surface of the objects highlighting the textures.  The barn doors helped to control the direction of the light and and the honeycomb helped to diffuse it.  I used a gold card to eliminate the shadows that was falling on the chickpeas and to the side of the shell.  The good thing about using a gold card instead of a reflector is that you get nice patches of light instead of a solid reflection, enhancing the textures even further.       


This first image clearly shows the shadows and dark patches.  


The gold reflector has been positioned correctly which has helped to eliminate the shadows and  bring out the texture well. 


One the first image you can see a harsh shadow has fallen over the subjects with the light being positioned directly behind, and the second image shows the textures well as I placed the gold card in front.    


This is my final submission as I love the composition and contrast of colours and textures in this image.  The flower, leaves and tree bark work beautifully together and complement each other perfectly.  I think using the medium format camera has helped me to achieve a much superior quality of image, bringing out every single detail of the objects.  Which is why I did very minimal post production work on these images.

Monday, 4 March 2013

Studio Photography: Studio lighting accessories

I'm a bit of a novice when it comes to using the studio and all the various paraphernalia that goes with it. Which is why I approached the studio unit with a certain amount of trepidation.  Having said that, I was looking forward to learning all about the diverse range of accessories you could have at your disposal to create the necessary visual effects to suit your relevant subject matter.

The benefits of studio photography is the lighting is artificial and you are able to control it to suit your subject matter, although it doesn't always have to take place within a studio setting or even indoors.  There are also many subject matters that can be photographed within a studio setting.

Studio can be used to photograph:
  1. Food 
  2. Products for advertising/commercial 
  3. Animals 
  4. Fashion
  5. Portraits 
  6. Still life

On the first night we were introduced to studio, which now seems like many moons ago, John gave us a whistle stop tour of all the relevant health and safety issues associated with using the studio. We were also introduced to a number of studio accessories we could use when photographing people/still life to create a particular mood or ambiance, whilst highlighting key features and characteristic.

There are two types of light sources that can be used in the studio.  A continuous light source, sometimes referred to as 'Red Heads' and a studio flash unit (strobe) to produce a variety of images.  The continuous light source usually uses halogen, fluorescent or tungsten light bulbs. The strobe has a modelling light which can be adjusted and is usually good for portraiture.

We produced a series of images using the the studio flash unit and a range of light modifiers.  Light modifiers are great for controlling the amount of light you have on your subject.             
  • Softbox
  • Beauty dish
  • Snoot
  • Honeycomb
  • Deep reflector

Softbox

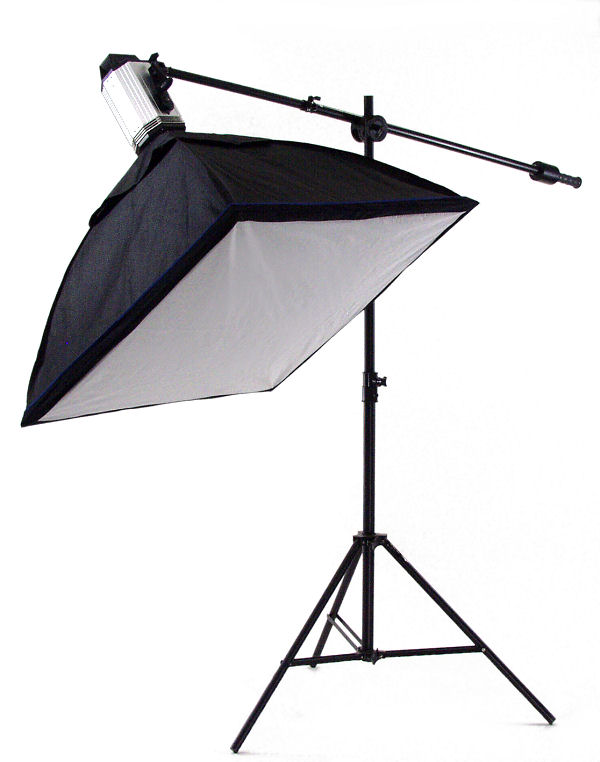
As the name suggests, the softbox is perfect for providing a softer and diffused pattern of light.  They come in all shapes and sizes and are good for providing an even coverage of light.  I used a rectangular softbox on the portrait below, for no other reason other than the square one was being used by the other half of the class.  The effect of using this type of softbox has resulted in giving a narrower band of light.  And as the subject has his head turned away from the light, it has resulted in some shadows on his face.       


Beauty dish

A beauty dish can provide a larger area of low intensity light and easier to control than the softbox.  The light hits the smaller dish, which is then reflected on to the larger dish, thus providing a softer and more diffused form of light.  They can also be fitted with a honeycomb to soften the light even further.  Using the beauty dish on this portrait has given a nice even soft coverage.  It has also eliminated most of the shadows, and is great for fashion shots.       


Snoot

This is a small circular directional light which gives a strong contrast.  It can be quite harsh and is not always best to use on its own.  The light can be quite narrow and concentrated, lighting a small part of the subject.  Although it has provided a good light on the subject, you can still see some strong shadows.      


Honeycomb grid

The honeycomb produces narrow beams of light whilst giving a soft edge all around it.  Unlike the snoot, the light is less harsh and not as focused or as intense.  The grids can vary in size, which indicates the tightness of the beams of light.  The positioning of the subject has cast a bit of a shadow to one side of the face.  A gold or silver reflector or a softbox could have been used  to eliminate this.              


A deep reflector

Gives a larger area of light, although not as strong as the snoot or as soft as the beauty dish or the softbox. The area inside the reflector is usually matt or silver and is quite contrasty.    


The first night we used all the light modifiers was quite rushed and didn't allow me to have a good understanding of the effects of using each modifier.  However, following on from there I have got to use the studio a little bit more, which has helped to become a lot more familiar with the characteristics of the different accessories and  the best usage for each one to get the desired effect.     

Friday, 1 March 2013

Wide angle perspective distortion

I missed the morning session of the class due to personal reasons so wasn't sure exactly what I was required to do.  However, after speaking to colleagues, I was told we were given the task to photograph something using the wide angle lens from a high or low perspective.  I still wasn't too clear about it but went on to seek inspiration around the college.
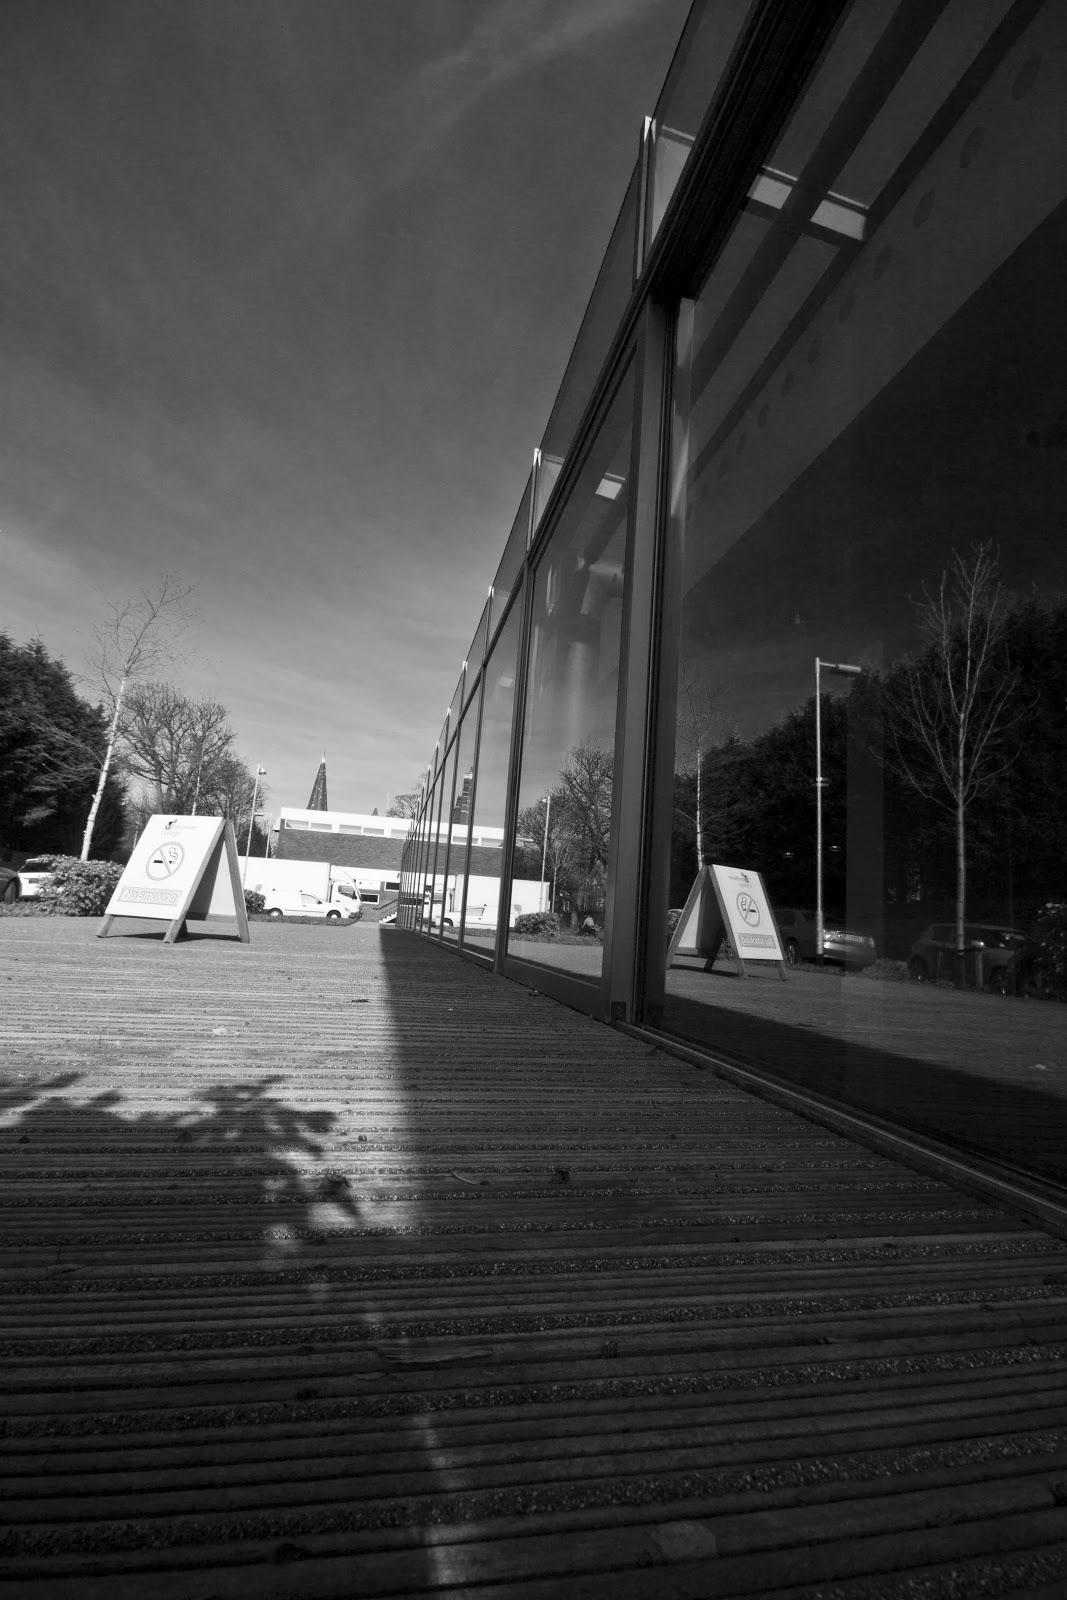
Using the college wide angle lens (Sigma 10mm-20mm) I took quite a few photographs from a low perspective.  The resulting images had, what you may refer to in technical term, as perspective distortion.  In lay mans term, perspective distortion is when an object that is closer to you appears bigger than something that's farther away.  This can be used in a creative way to emphasise specific elements in an image.   
Below are some of my efforts from the day.  I'm not very happy with what I've achieved so I'll be having another go at this. However, given my limited understanding of the task I feel the images just about demostrate the effects of wide angle perspective distortion.      


Sunday, 20 January 2013

Brief 2: Interior Location - George Barnsley & Sons Ltd

Trying to find a suitable subject matter for the interior location brief proved to be more difficult than I envisaged! I think primarily because I'm used to doing most of my photography outdoors - landscape, cityscape, seascape etc.  My initial idea was to photograph a ballet class.   Imagine the scene - graceful and elegant little ballerina's in their pretty little tutus and ballet pumps, fluttering like butterflies, gliding effortlessly across the dance floor.   Moving their delicate and dainty little limbs to the rhythm of the music.   It wasn't long before images of Swan Lake and Black Swan started floating around in my head! If only my romantic notions had any resemblance to reality!

After contacting several dance company's I got an immediate response from one of them.  Everything was arranged and I was set to photograph the class just before Xmas - it was the night of the College Xmas party. As non of my class mates were attending the party, I didn't feel as if I was missing out on much, and who wants to look like a Billy no mate anyway!

I turned up to the class and was greeted by the very lovely dance tutor I had been liaising with.  The group of ladies were very co-operative and sometimes a little shy with a camera pointing at their faces.   The only thing was, and it's probably my own fault for having unrealistic expectations, they were not dressed in the traditional ballet outfits.   Of course they had ballet pumps on but not a tutu in sight.   They were in a community hall, which of course looked nothing like a dance studio.   I was a little disappointed as I was hoping to capture some beautiful abstract movements, shapes and lines with a background that complimented the energy of the dance.   I did witness the ladies performing many arabesque and adagios but my images didn't quite come up to the fantasy I had created!

Using my tripod and slow shutter speed I tried to experiment with movement but the results didn't come out to my satisfaction.  I haven't given up on the idea of capturing ballet dancers, and it's something I will re-visit at some point in the future, because knowing me, I never rest until I get what I really want.

This is more in line with what I had in mind, although I've probably got a long way to go before I can produce anything like this! - http://www.guardian.co.uk/stage/gallery/2013/jan/16/royal-ballet-dancers-in-pictures?CMP=twt_gu#/?picture=402429924&index=7
 

f3.2, 1/30th, ISO 200

When it comes to getting rid of images, my fingers are on that delete button faster than you can say 'cheese'!! it's mainly down to being quite self critical and always striving for perfection. But as someone once said 'never get rid of something and always re-visit' I have taken that advice and have re-visited some of my ballet images - looking back on them, they're not actually that bad and there are one or two I quite like.
 

This is my favourite as I managed to capture all of them as they jumped in sync and became airborne - a little bit of a decisive moment!


f3.2, 1/30th, ISO 200


There's something I like about this image that I can't quite put my finger on - maybe it's the way she's jumping up and almost leaping out of the frame. It probably breaks the rules of composition but her enthusiasm for the dance comes across really well.
 
Not fully satisfied with what I produced I moved onto something I was thinking of for a while.   I recently started to develop an interest in urban exploration after looking at some great images produced by a friend, of an old derelict building near my home town. I asked a few photography colleagues for ideas of places to visit and some of them suggested a few mills and factories around Oldham/Saddleworth and Uppermill.   I looked them up but they didn't really appeal to me - I didn't feel the interiors were interesting or exciting enough for me and needed something a bit more to get my teeth into.
 
 
In the meantime I started researching photographers for my interior location brief.  I came across many urban explorers who passionately enjoyed taking photographs of old, abandoned buildings. However, there wasn't any famous or influential photographer who specialised in this subject matter, something I was a little surprised by.
 
After a while I came across a Belgium born photographer called Henk van Rensbergen. Born in 1968, Rensbergen was a pilot by occupation but he's been photographing since the age of 15.   According to Rensbergen, urban exploration has always been in his blood and his curiosity has got him into trouble with the authorities.

Looking at Rensbergen's images I can see how he effortlessly manages to bring the abandoned factories, hospitals and theatres to life, drawing our attention to the stories behind the images. His images can challenge the viewer to question the role these neglected old structures play in the environmental and political arena.
 
Rensbergen's does a wonderful job of capturing all the finer details of these man made edifices and makes you feel a certain connection with his images. Looking at the images you feel a sense of sadness and lament but in their decomposing state, you get to have a glimpse of this hidden world, a world you wouldn't normally get to see.
 
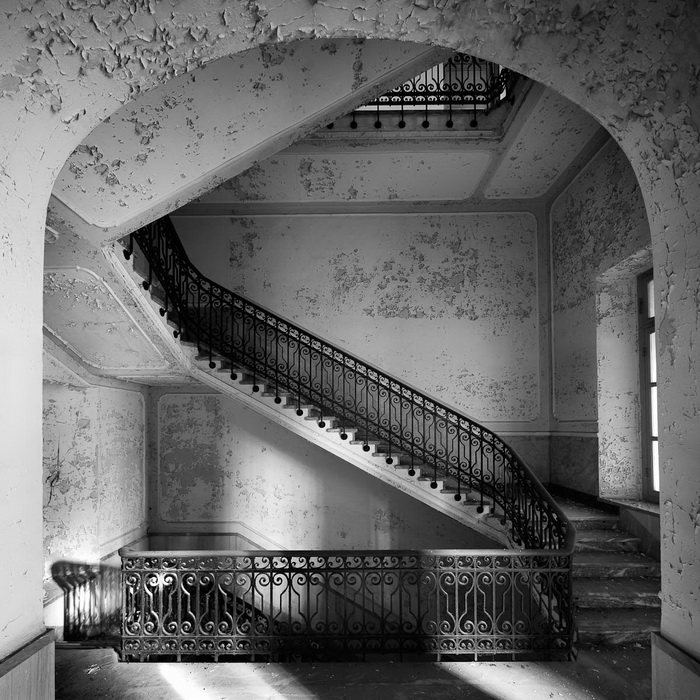
I really like the images I have selected, mainly because of the excellent use of ambient lighting, framing and composition. I like the clarity of the images and how he manages to bring out the tiny little details and textures. I will be happy if I manage to recreate some images that come up to this standard.
 
 
© Henk Van Rensbergen


An abandoned hospital in Italy, photographed by Henk Rensbergen and featured on his website, abandoned-places.com
 
 
One of the places suggested by one of my colleagues was Bailey Mill in Delph, an old cotton/textile mill.   The latest report shows what a poor state this building is in at the moment.   Reports from a few years ago show a lot of equipment and machinery but over the years the place has been wrecked and ransacked and not much remains other than a shell of a building.   Although this would have been a fairly convenient and easy place for me to get to, I don't really like taking the easy way out!  
 
 
Bailey Mill, Delph Oct 2012 -Report/photograph by Marsden1002


I browsed through various online forums, trying to find inspiration . . . and there it was! George Barnsley & Sons Ltd in Sheffield, a building that really caught my eye.  Founded in 1836, it was a family run business, specialising in forge filing, supplying cutting tools for leather workers and shoe makers as well as manufacturing blades and butchers knives. Sadly, like many manufacturers in the UK, it fell into decline due to increasing cost of production and the expansion of the import market. The building reportedly closed around 2003.    
 
After a little digging, it appeared many explorers have been to this magnificent building to try and capture some of the fascinating pieces of history left behind.   Researching this place helped me to discover the unfamiliar, often very risky and very much hidden and captivating world of urban exploration.   I intentionally didn't look at many images of this building as I wanted to capture my own vision rather than be influenced by what others had done in the past.   I did look at the last report on this building, which made me feel like I had a challenge on my hands! taken by an experienced explorer, the photos were pretty good.   Looking at his images fuelled my desire to try and photograph this historic building, at whatever cost and without sensibly assessing any risks involved!


My first trip down to Sheffield to photograph this building didn't exactly prove to be very fruitful! I tried to find the exact location and relied on Google maps to help me get there. A week before Xmas, I spent a cold and windy afternoon in Sheffield, but no sign of George Barnsley! I did however take some nice (exterior!) shots and was quite pleased with them.       


Determined not to give up, I wanted to be better prepared for my next trip down to Sheffield.   So I registered on an urban explorers forum and made contact with some of the members to try and get a little bit more information to help me in my quest.   Suffice to say, information wasn't easy to come by, and understandably so.   Urban explorers are interested in the preservation and protection of these truly unique places, and the last thing they want is some random stranger to turn up with their own personal agenda and do something that might spoil it for everyone else. Nevertheless, to my surprise, my persistence and persuasive skills paid off!
 
From what I can understand, urban exploration is all about appreciating the history, architecture and the beauty of what lies within the decay and dereliction of these old buildings. For some it's all about stepping back in time to document and catalogue all the artefact's and be one of the last witnesses to these monumental structures, capturing some of the remnants of the forgotten past.
 
For me of course, the desire and determination to produce something a little different, that might arouse the viewers curiosity, superseded any fear, anxiety or reservations I might have had of falling from a great height! somehow my fear of heights literally went out of the window and I suddenly found myself quite excited at the prospect of capturing something special. Not knowing first of all whether I would get in and out of the place in one piece, secondly whether the place would live up to my expectations and thirdly, whether I would do justice to the images.
 
Armed with just my Canon 500D and my trusted 17-55mm 2.8 lens, I entered the building risking life and limb and getting wet and muddy in the process.   But there was very little time to pay attention to how dirty my knees were getting! My heart was beating fast, still on a high from the rush of adrenalin!! It's probably one of the scariest if not riskiest things I've done in my life! yes, I've lived a boring life! Suddenly I felt like I had travelled to another time zone.  What an extraordinary place, you just had to be there to truly appreciate all that it has to offer.  So many rooms to explore, I was like a kid in candy store! I had trouble trying to decide which room to go in to first.
 
It was around 1pm and I didn’t want to lose any valuable time, as the light would be fading soon and I would find myself seriously compromising on quality of image.   There was plenty of rooms with lots of windows and others with very few.  This meant some of the rooms were glowing from the sun beams shining through, whereas others were quite dark.  I knew doing in interior shoot without a flash and very little natural lighting would be quite a challenge - but then, who doesn't like a challenge! To correctly expose the images I would have to slow the shutter down and increase the ISO.  Although having a tripod would have been a great help, given the constraints of entering the building, there was no way I could carry one in with me.  So I relied on my steady hands, although I knew a certain level of noise would be unavoidable.
 
Three hours later I was on my way out, feeling like the cat who got the cream! Looking through my images I couldn't believe I had taken around 400 shots! I've not taken that many images in one go since the time I did my very first wedding a few years back.  Over time I have learnt to become a little less trigger happy and quite selective of the shots I take.  Whittling down to my final ten wasn't as hard as I thought it was going to be.  With some valuable input from my friends and colleagues I managed to select what I believe to be the strongest ten.
 
But for now I'll go through the ones that nearly made it.  The dead bird was one of the last things I noticed just before I was about to leave the building, and it was purely by accident.  I was about to make my way down the stairs when I suddenly thought there was one part of the rooms upstairs I didn't venture into - how could I leave not knowing what I might find there. I ran back and noticed this dead bird in one of the cupboards - I couldn't understand why a bird would end up dying there as many of the windows were cracked or open so it wasn't because it just got trapped.  Maybe it was injured and just couldn't make it out. 

It has very much become part of the death and decay process along with the rest of things in the building.  I do like this image quite a lot but I feel it just didn't quite fit in with the rest of the selection.  There was quite high level of noise, as it was the end of the day and I had to work with very little light - I used ISO 800 and 1/15th shutter speed, which has resulted in some blurring of the image.  


f2.8, 1/15th, ISO 800, 43mm

     
What I like about this image is the open cupboard doors, nicely lit up by the late afternoon sun coming in through the windows. However, I don't like the shadows on the left and feel far too much detail has been lost.  There's also quite a bit of noise, having to use ISO 400.       
2.8, 1/13th, ISO 400, 17mm 

 
This is probably my least favourite image.  Although the vibrant colours of the bricks and the paint shows up well, there's not enough going on in the image to grab and hold the viewers attention. 
f2.8, 1/13th, ISO 400, 17mm
 

It was all the pipes and metalwork that attracted me to this part of the building.  It was one of the out buildings and was very different from the rest of the buildings.  I like the colours of the corroded rusty pipes set against the bluey green wall. There was very little light spilling through the cracks of the ceiling - hence the slow shutter speed and high ISO.  I'm surprised I didn't have a lot more camera shake with this image at such a slow shutter speed.  This image simply wasn't as strong as the rest.     


f3.5, 1/8th, ISO 800, 17mm


MY FINAL TEN

 
 f3.5, 1/15th, ISO 200, 17mm
This is one of the images that really stood out for me.  The vibrant blue colour of this unit set against the dirty, messy floor provided a great contrast and added a lot of interest for the viewers.  Doors wide open, cracked and peeling paint helped to add a lot of character to this image.  I really love the way the light coming through the window catches the top of the drawers - shot from a low angle, it has a lovely leading line towards the window - this is exactly why this image is in my final ten.  Luckily the sunlight helped me to keep my ISO down and with a slightly lower aperture I achieved a certain amount of shallow depth of field, which helped to isolate part of the image to keep in focus but still highlighting a good level of detail. 
  
 
f2.8, 1/13th, ISO 800, 24mm 
It didn't take me long to decide that this image should be included in my final ten.  Wondering into a part of the building that resembled a kitchen, these precious little items were on a shelf in the corner.  They were quite far away from the window with only a little ray of light falling on the wall above the tea set.  How ironic to see a little tea set covered in dirt and grime but a tea pot still covered with a tea cosy.  Makes you wonder about the lives of the workers in there, whether this place was a home from home for them.          


f2.8, 1/15th, ISO 200, 17mm


This is one of the first rooms I went into on the ground floor and probably spent the most amount of time in.  There's a lot going on in this room and I like way your eyes are drawn to the many little things scattered all over the floor.  I was particularly curious about the colourful sheets of prints/drawings strewn all over the room - this leads nicely to my next image . . . .

f2.8, 1/20th, ISO 400, 23mm 
This was taken in the same room. These prints weren't just on the floor but also stuffed inside the cabinet.  I did quite a few close up shots of the prints with low aperture to get a bit of an abstract feel them.  I didn't do too many close up/abstract shots and stuck to using wide angle on most of the images.  Primarily because there's so much to observe in this place, I wanted to capture as much as I could and give the viewer an insight into what a truly fascinating place this is.       
 
f4, 1/15th, ISO 400, 20mm
This is was one of the last few images going into my final ten. I wasn't too sure about it at first mainly because most of the other images were either very busy with lots of points of interest or had a clear focal point.  This image at first looked to me like it was too empty - not a lot going on, until I noticed the golden rays of the sun shining on the ladder - without the ladder the image would have a looked little too bland but the ladder with the windows next to it is the highlight of the image.     


f4, 1/15th, ISO 400, 17mm
 

For someone who loves colours it was no surprise I was instantly drawn to this room.  I have placed the units bang in the centre on purpose.  I wanted to show how something so beautiful and colourful still stands tall, amongst the wreckage and destruction that surrounds it.  If you don't look at the image long enough you might actually miss the fact that, strangely a chair stands on top of the cupboards - you might be thinking - why? when? who? we'll never know.                  

 
f4, 1/20th, ISO 200, 17mm

This room looked very much like an office - it had desks and chairs, a really old type writer and filing cabinets - papers it had plenty but most of it trailing across the floor.  I can only guess everything was filed away as the owners left but one day along came some clever little vandal who thought it might be a good idea to throw them all over the floor. 


f3.2, 1/15th, ISO 400, 17mm

This is one of my absolute favourite images.  I really like the composition, but more than that I love the fact that there's so much in this room, you could come back to it time and time again and discover something new, something you may not have spotted the first time round.  It makes you wonder what lies beyond those open doors - perhaps promises of more discoveries to be made.  Even though there's so much going on, there's one thing that really makes this image - that's the poster of the bikini clad girl on the wall - like a window into the past, it gives you a little glimpse into the lives of the people who once worked in this building.       


f2.8, 1/13th, ISO 100, 28mm
 

This was also an accidental discovery.  This lamp shade was left on a table right next to the entrance of this room.  Even though it was to my left as I entered the room, I actually didn't notice it until I was about to leave the room.  Funnily this was the last shot I took in this room and this turned out to be best image I got from that room.  Sometimes it takes a while to take in the mood and surroundings of a room and that's what happened with this - I'm so glad I did notice it because I believe this image has many stories to tell.       
 
 
This again was one of the last images to go in my final ten.  Looking back on it, it fits perfectly with the rest of the images.  Like the others, I feel this image reveals more about the lives of the people who worked there than the work they did.  I really like how different shades of red, brown and grey compliment each other.  Beautifully leather bound, they look almost too valuable to be left out here.       


f2.8, 1/25th, ISO 400, 17mm


I did very little post processing on my images and stuck to doing the bare minimum to give an accurate representation of what I captured. I had to use a little bit of fill light in order to show detail and use contrast and clarity to bring out the textures and colours. I think the lack of ambient light in some of the images helps to create mood and atmosphere in the images.
 
Being an aspiring photographer, I'm constantly evaluating and analysing my work to try and find my place and identity within this overcrowded photographic world.  I no longer have that burning appetite to capture, what you may traditionally describe as a beautiful image.  I consciously wanted to step away from what I always do best - photographing landscape/architecture/nature.  The decision to photograph the shipwrecks and then George Barnsley, has enabled me to make significant progress on my photographic journey, and of course this is only the beginning.  With my images I wanted to express my individuality rather than follow the crowd. 
 
Through my images I was able to show some of the transformation, a man-made structure like George Barnsley goes through when abandoned and left to crumble.  Facing daily battles with the elements and the odd intruder here and there.  It's quite disheartening to see places like this loosing their purpose and reasons for existence.  If it wasn't for the vibrant colours of the corrosion and decay, with beams of light spilling through the cracks of the ceiling and the broken windows, I wouldn't have had so many beautiful images, helping me to freeze a moment in time.  I rather enjoyed stepping into this alien and often dangerous world of urban exlporation, so I may return!